> For the complete documentation index, see [llms.txt](https://docs.theseaai.com/llms.txt). Markdown versions of documentation pages are available by appending `.md` to page URLs; this page is available as [Markdown](https://docs.theseaai.com/main/jp/tasuku/retatchi.md).
# レタッチ
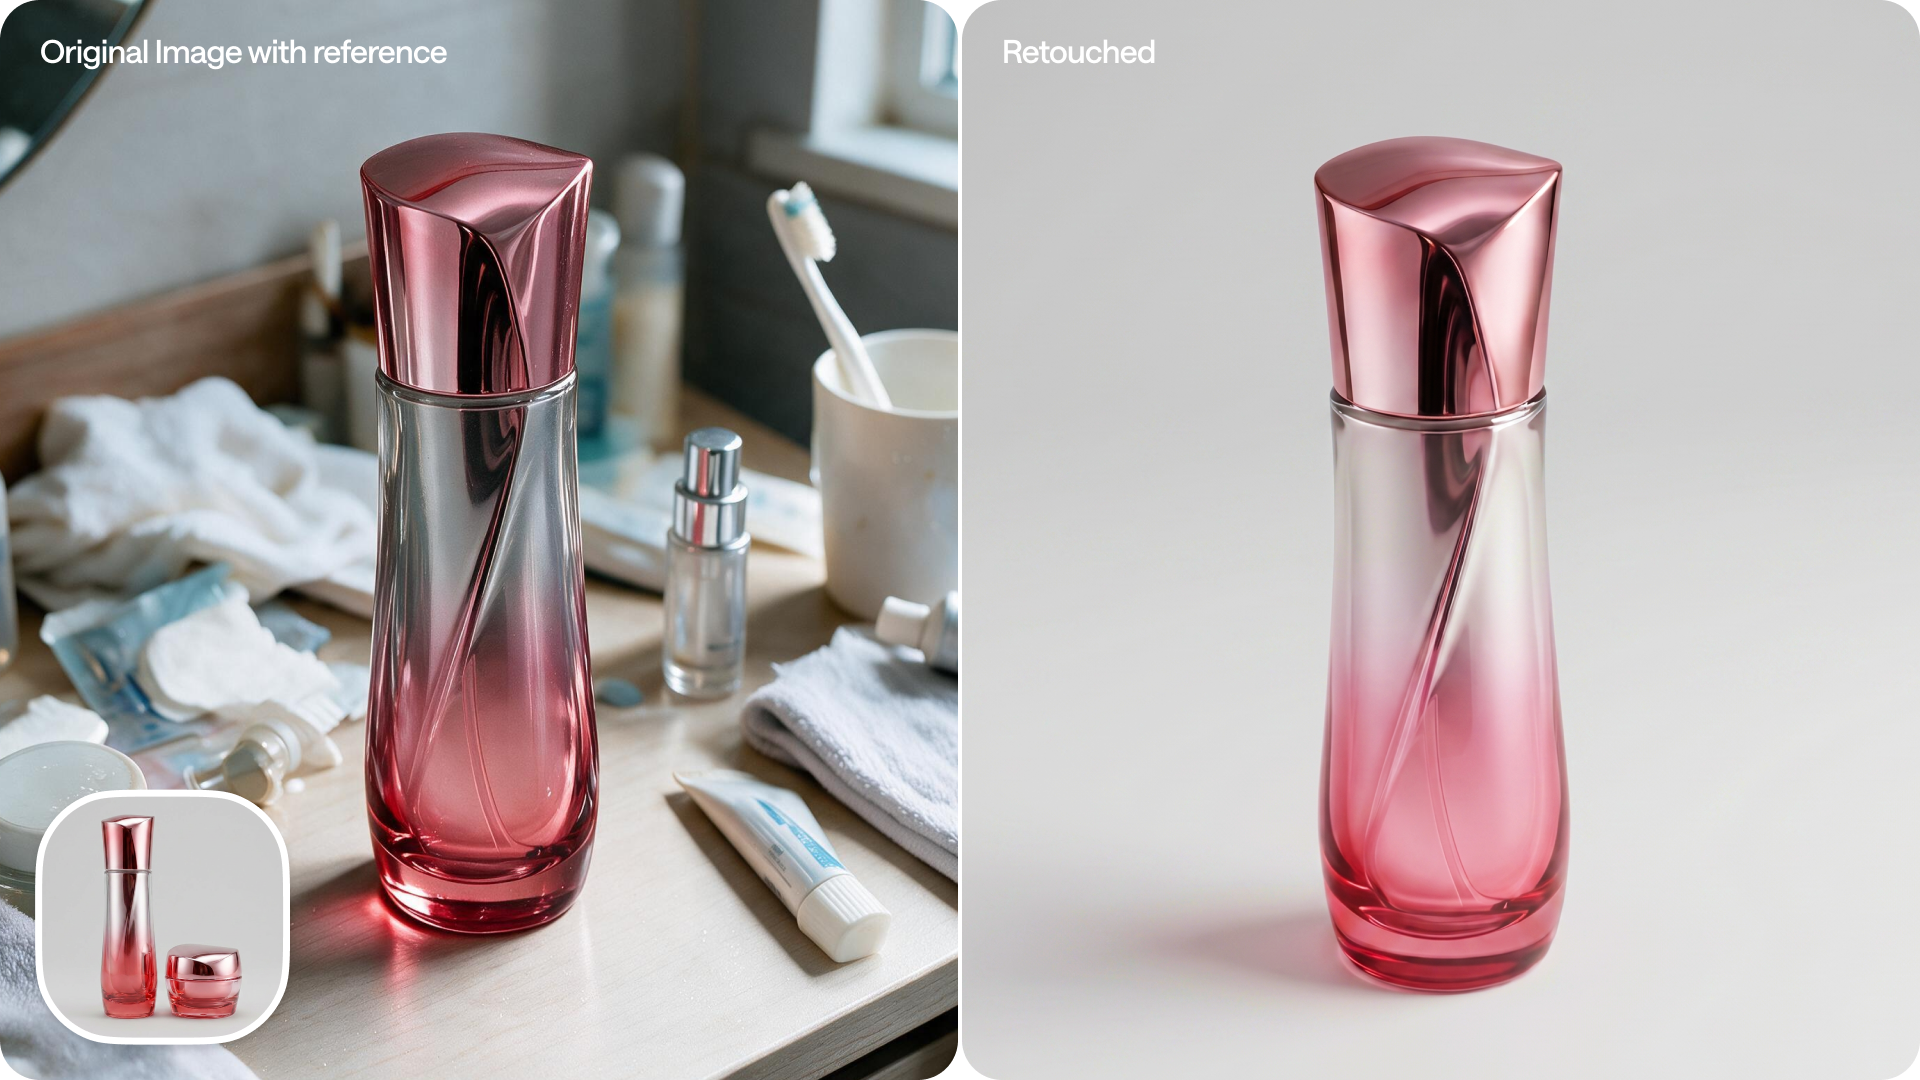
1回の生成ステップで、自動画像補正を適用します。Retouchは、構図を保ちながら、ライティング、色バランス、形状、表面ディテール、髪、背景の清潔さを調整します。
***
#### 商品画像をレタッチする
#### 髪をレタッチする
***
## インタラクティブチュートリアル
{% hint style="info" icon="language" %}
**チュートリアルの言語を変更する方法**\
チュートリアルは既定で英語で表示されます。このチュートリアルを別の言語で表示するには、右上隅にカーソルを合わせて、 :language: **言語**.
{% endhint %}
{% @arcade/embed url="" flowId="amHhRqnkiRXfvdtIMe9r" %}
***
## 使い方
{% stepper %}
{% step %}
#### 「Retouch」を選択
左側のタスクメニューで、を選択します **Retouch**.
これにより、現在のシーンのRetouchワークスペースが開きます。
{% endstep %}
{% step %}
#### 商品画像をアップロードする
商品画像は前景要素として使用されます。
画像のアップロード方法は次のとおりです:
* を選択 **画像をアップロード** シーン内で
* パソコン上のフォルダーから画像をドラッグ&ドロップする
* 画面左下のライブラリパネルから画像をドラッグ&ドロップする
アップロードすると、商品がシーンに表示されます。
{% endstep %}
{% step %}
#### 角度を維持するか変更するか
の **商品設定** セクションでは、Retouchは既定で商品の元の角度を維持します。
をオンにする **角度変更を許可** と、Retouchが角度も調整します。
{% endstep %}
{% step %}
#### 参照画像を追加する
引き続き **商品設定**、商品の参照画像を追加できます。
を選択 **+ 画像を追加** 参照画像をアップロードします。参照画像を使うと、Retouchが商品の細部をより正確に保持しやすくなります。
この手順は任意です。
{% endstep %}
{% step %}
#### 出力数を選択する
右側の生成用Retouch設定パネルで:
* 生成するバリエーション数を選択します。
* 一度に最大2シーンまで生成できます。
{% endstep %}
{% step %}
#### 生成の精度を選ぶ
の横で **生成** の矢印を選択して、精度のドロップダウンを開きます。詳細は [#choose-generation-effort](#choose-generation-effort "mention")
* **標準** が既定で選択されています
* **高精度** 細かい、または複雑なディテールのある商品向け
{% endstep %}
{% step %}
#### 生成
すべての設定を確認したら、を選択します **生成**.
生成されたシーンはPlaygroundに表示されます。
{% endstep %}
{% endstepper %}
***
## 商品設定
商品設定では、元の角度を維持するかどうかを選び、参照画像を追加して細部を正確に保てます。特に、形状が複雑な商品や細かなディテールがある商品に便利です。
#### **商品の元の角度を維持する(既定)**
すでに希望どおりの角度で商品を撮影している場合に使用します。
#### **Retouchに角度を変更させる**
よりすっきりした、または一貫性のある角度にしたい場合に使用します。
#### **参照画像で商品詳細を一致させる**
商品に細かなディテールや複雑な形状があり、Retouchだけでは正確に仕上がらない可能性がある場合に使用します。
{% hint style="info" %}
最良の結果を得るには、 **高精度** 複雑な商品の参照画像を使用する場合は生成の精度を選択してください。
{% endhint %}
***
### Retouchの生成精度
生成精度は、Retouchが生成前に画像をどれだけ詳しく解析するかを左右します。これにより、複雑な商品の細部も自然なまま反映されます。
精度レベルは2つあります:
* **標準** (既定):ほとんどの生成に最適です。所要時間は約60秒です。
* **高精度**:画像を細かく解析します。複雑な商品に最適です。所要時間は約140秒です。
***
## 髪のレタッチ
Beachsideは画像内の髪を認識し、自動でレタッチします。飛び毛を整え、ツヤを高め、ボリューム感を加えます。
***
## FAQ
参照画像はいくつ追加でき、何に使いますか?
* 商品ごとに最大3枚まで参照画像を追加できます。
* 参照画像を使うと、Retouchが商品の実際のディテールに合わせやすくなるため、追加の指示やプロンプトは不要です。
角度が既定で固定されているのはなぜですか?
Retouchは既定でアップロードした写真の角度を維持するため、商品は撮影した状態と一貫して保たれます。をオンにすると、 **角度変更を許可** Retouchに角度を調整させることもできます。
---
# Agent Instructions
This documentation is published with GitBook. GitBook is the documentation platform designed so that both humans and AI agents can read, navigate, and reason over technical content effectively. Learn more at gitbook.com.
## Querying This Documentation
If you need additional information that is not directly available in this page, you can query the documentation dynamically by asking a question.
Perform an HTTP GET request on the current page URL with the `ask` query parameter, and the optional `goal` query parameter:
```
GET https://docs.theseaai.com/main/jp/tasuku/retatchi.md?ask=&goal=
```
`ask` is the immediate question: it should be specific, self-contained, and written in natural language.
`goal` is optional and describes the broader end goal you are ultimately trying to accomplish on behalf of the user. GitBook uses it to tailor the answer towards what is most useful for that goal.
The response will contain a direct answer to the question and relevant excerpts and sources from the documentation.
Use this mechanism when the answer is not explicitly present in the current page, you need clarification or additional context, or you want to retrieve related documentation sections.